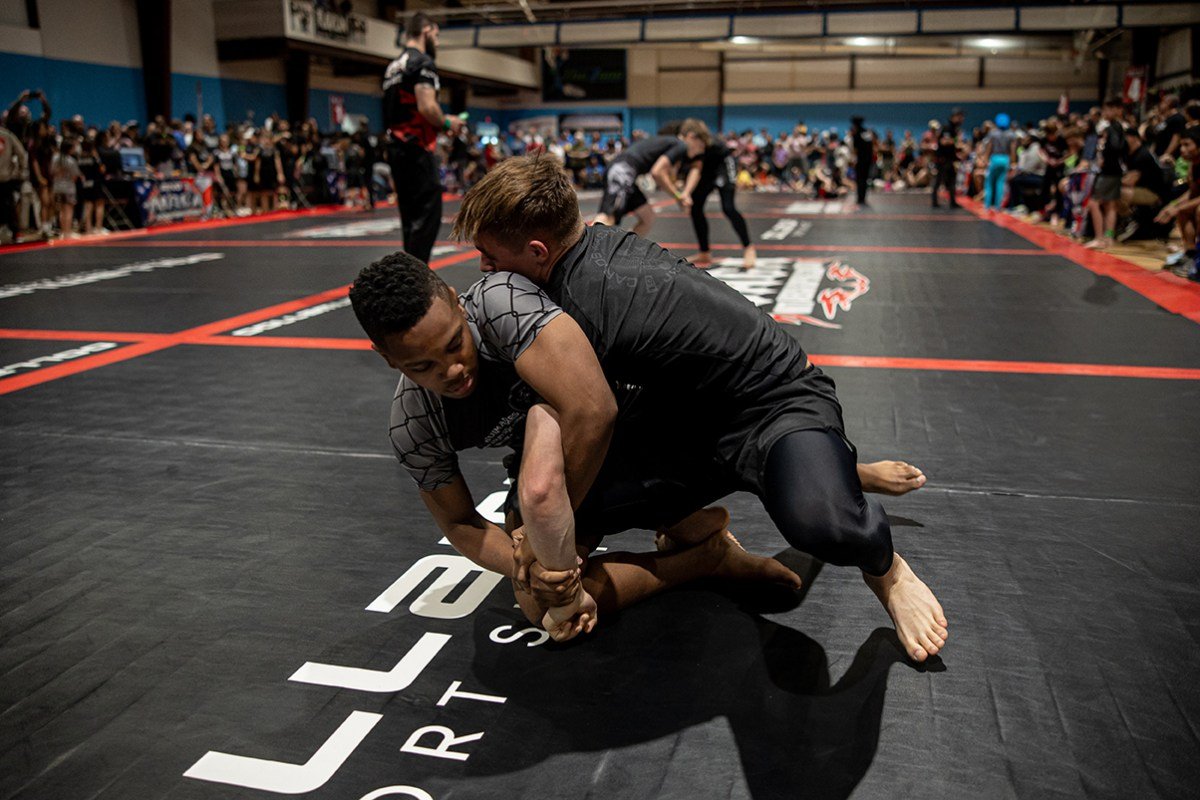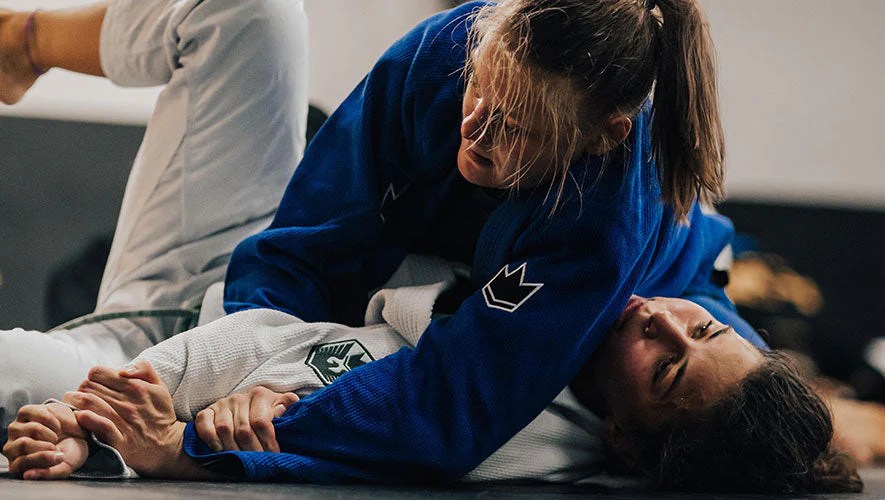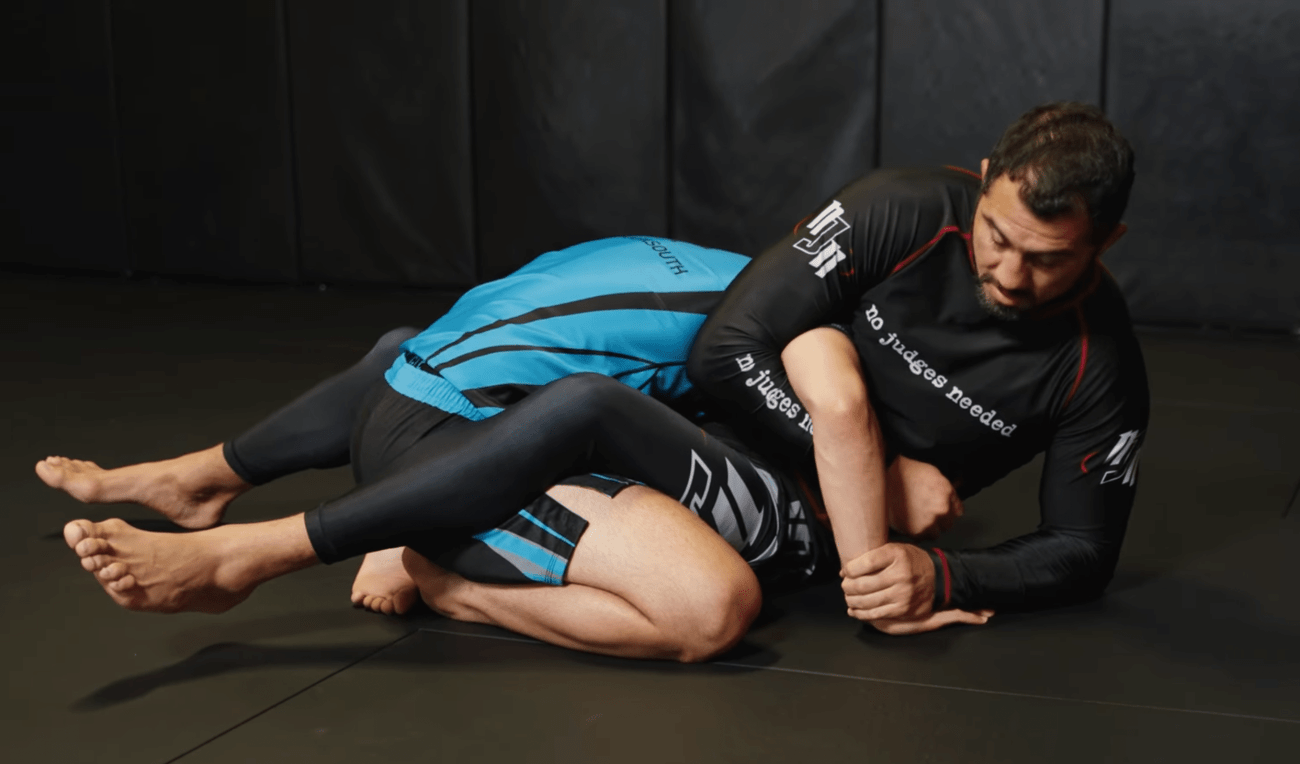
The kimura is arguably the most complete submission in BJJ.
Table of Contents
Every other submission gets you a tap or it fails. The kimura gets you a tap, a sweep, a back take, a guard pass, or a transition to another submission — all from the same grip. Once you understand it as a control system rather than a single attack, it changes the way you grapple.
On October 23, 1951, Japanese judoka Masahiko Kimura used this shoulder lock to defeat Helio Gracie at the Maracanã Stadium in Rio de Janeiro. Helio refused to tap. His corner threw the towel. The Gracie family honoured their opponent by naming the technique after him. It has been a cornerstone of BJJ ever since.
In the UFC, the kimura has produced 40 documented submission victories — the 6th most common finish in the sport’s history. Frank Mir broke Tim Sylvia’s arm with it 50 seconds into a UFC heavyweight title fight. Anderson Silva used it to submit Chael Sonnen in one of MMA’s greatest comebacks. Fabricio Werdum finished Fedor Emelianenko with it in one of the sport’s biggest upsets.
This guide covers everything — the grip, the mechanics, finishes from every position, the kimura trap system, and how to drill it at every belt level.

What is the kimura?
The kimura is a shoulder lock submission that uses a figure-four grip to rotate the opponent’s arm behind their back. It places extreme rotational stress on the shoulder capsule and rotator cuff. When the rotation reaches the joint’s limit, the opponent taps — or risks a torn rotator cuff or dislocated shoulder.
It is known by several names across martial arts:
- Kimura — the name universally used in BJJ, named after Masahiko Kimura
- Gyaku ude-garami — the Japanese name in judo, meaning “reverse arm entanglement”
- Double wrist lock — the catch wrestling name for the same technique
What makes the kimura exceptional is its dual nature. It is both a submission and a control position. The figure-four grip gives you a lever that controls your opponent’s entire upper body — not just their arm. From that grip, you can finish the submission, sweep to top position, take the back, or transition to a different attack. No other single submission in BJJ offers this range of options from one grip.
Competition fact: The kimura has produced 40 documented UFC submission victories — the 6th most common finish in UFC history. It works at every level from white belt regional tournaments to ADCC superfights and UFC title bouts.
History — the 1951 match that named a technique
According to Wikipedia’s entry on the kimura lock, the technique itself predates the famous 1951 match — it was part of judo’s arsenal as gyaku ude-garami and was also used extensively in catch wrestling as the double wrist lock. What the 1951 match did was cement the technique’s place in BJJ history permanently.
Masahiko Kimura was the dominant judoka of his era — a multiple-time All-Japan Judo Championship winner who outweighed Helio Gracie by approximately 17 kilograms. According to BJJ Heroes, the match was held at the Maracanã Stadium before a crowd of thousands. Kimura dominated from the start. When he secured the shoulder lock and continued rotating past the tapping point, Helio’s arm broke. His corner stepped in to stop the match.
The Gracie family’s decision to name the technique after Kimura is one of the most respectful gestures in martial arts history. It acknowledged that an opponent had beaten them with a technique so effective it deserved permanent recognition.
The kimura remained central to BJJ through every generation of the sport’s development. Today, elite competitors like Gordon Ryan, Craig Jones, and Garry Tonon have built entire systems around the kimura grip — using it as a control position that opens the entire upper body, not just the shoulder.

How the kimura actually works
The kimura attacks the shoulder joint through a specific rotational stress. The shoulder is a ball-and-socket joint with wide range of motion — but that range has limits. The kimura takes the arm to the external rotation limit by pushing the hand upward and behind the back.
Three anatomical structures are under stress during a kimura:
- Rotator cuff muscles — the primary target. Forced beyond their rotation range, they tear if the submission is held past the tap.
- Shoulder capsule — the fibrous tissue surrounding the joint. Stress here causes the immediate pain signal that triggers the tap.
- Elbow joint — secondary stress point. The figure-four grip also places some torsional force on the elbow, which is why the kimura comes on quickly even before the shoulder fully rotates.
Safety note: The kimura comes on fast — faster than the armbar. Apply pressure slowly and with control in training. Your partner may not have time to react before the joint is in danger. Always allow a full second of increasing pressure before committing to the finish. Release immediately on the tap.
The figure-four grip — how to lock it correctly
The figure-four grip is the foundation of the entire kimura system. Everything else depends on getting this grip tight and maintaining it through every transition.
- Grab their wrist. Use your same-side hand to grip your opponent’s wrist — not their hand. Wrist grips lock. Hand grips slip. Grip above the wrist bones, not on the palm.
- Thread your arm under their elbow. Your other arm goes under their elbow and over their forearm. Your forearm sits behind their forearm.
- Grab your own wrist. With the arm that just went under their elbow, reach up and grab your own wrist — the wrist that is already holding their wrist. This completes the figure-four.
- No-thumb grip option. Many high-level practitioners grip without wrapping the thumb. This creates a stronger mechanical lock and generates more rotating power than a standard thumbs-in grip. Try both and use whichever feels more secure under pressure.
- Clamp to your chest. Pull the entire grip tight against your ribcage. The elbow stays pinned against your body at all times. Think of hugging their arm to your chest rather than holding it at arm’s length.
Key grip principle: The grip should feel like their arm is fused to your chest. No daylight between their elbow and your ribs. If you can see space, they will use it to escape.
The 90-degree rule — most important detail
The opponent’s arm must stay bent at approximately 90 degrees throughout the entire kimura — from setup through finish.
Here is why this matters: if their arm straightens past 90 degrees, the shoulder joint can rotate to relieve the pressure. The kimura grip still exists but the submission loses its lever. Your opponent will feel the pressure ease and use that moment to peel the grip or roll out.
If their arm bends past 90 degrees toward their own shoulder, you lose the mechanical advantage on the elbow and the rotation becomes less efficient.
90 degrees is the exact angle where you have maximum control, maximum leverage on the shoulder, and minimum ability for the opponent to straighten or bend their way to safety.
How to maintain 90 degrees: Keep the elbow pinned to your body. The moment the elbow floats away from your chest, the arm can straighten. Squeeze the elbow in throughout every transition — not just when you are finishing.
Kimura vs americana — what is the difference?
Both the kimura and the americana use the same figure-four grip. The difference is the direction of rotation.
| Element | Kimura | Americana |
|---|---|---|
| Rotation direction | Arm goes upward and behind the back | Hand pushed down toward the mat |
| Analogy | Reaching for a wallet in your back pocket | Arm-wrestling the arm into the floor |
| Best positions | Guard, side control, north-south, half guard | Mount, side control (arm flat on mat) |
| Arm position required | Arm accessible from outside or above | Arm flat on the mat beside their head |
| Most common entries | Posted arm, underhook attempts, frames | Opponent defending with flat arm |
A simple rule: if their arm is raised or you access it from the outside, think kimura. If their arm is flat on the mat beside their head, think americana. Both use the same grip — the entry position tells you which direction to rotate.

Kimura from closed guard — step by step
The closed guard kimura is where most practitioners learn the technique first. When your opponent posts their hand on your chest or hip to posture up, that arm is your target.
- Break posture and isolate the arm. From closed guard, break your opponent’s posture down with a collar grip or two-handed head control. When they post their near arm on your chest, grab that wrist immediately with your same-side hand and push it toward the mat.
- Lock the figure-four. Thread your other arm under their elbow and over their forearm. Grab your own wrist to complete the figure-four. Confirm the arm is at 90 degrees.
- Pin the elbow to your chest. Pull the grip tight against your ribs. No space between their elbow and your body.
- Open guard and rotate. Open your guard. Rotate your body away from the trapped arm — turning toward their head. Do not pull with your arms alone. Rotate your entire torso.
- Drive the hand behind their back. Rotate the hand upward, toward their head, then behind their back. Keep the 90-degree angle throughout. The shoulder reaches its limit. The tap comes.
Kimura sweep from guard
The kimura from guard is not just a submission — it has a built-in sweep. If you only look for the tap, you are using half the technique.
When your opponent straightens their arm or pulls back to defend the submission, their weight shifts backward. Use that moment: sit up, drive into them, and use the kimura grip as a handle to pull them over your body onto their back. You end up on top with the grip still locked in side control or mount.
This sweep works even against opponents who know the kimura submission is coming. The more aggressively they straighten the arm to defend, the easier the sweep becomes. Defending one threat creates the other — this is the dual nature of the guard kimura.
Kimura from side control
Side control is arguably the best platform for the kimura. You already have weight advantage, positional control, and easy access to the near arm.
- Identify the posting arm. From side control, your opponent will often post their near arm against your hip or chest to create frames. This is your entry.
- Scoop and lock the figure-four. Scoop under their posted elbow with your near arm. Grab your own wrist behind their forearm to complete the figure-four. Push their wrist toward the mat with your other hand while you lock.
- Turn to face their legs. This is the key detail for finishing from side control. Turn your torso to face their legs — not their head. This uses your entire body as a lever rather than just your arms.
- Step over and finish. Some practitioners step their far leg over the opponent’s body while turning to face the legs. This additional rotation amplifies the shoulder pressure and makes the finish very tight.
- Drive the hand toward their back. Rotate the hand upward and toward the small of their back. Steady pressure. The tap comes quickly.
If your opponent turns into you to escape, keep the grip and follow them. Their escape movement often exposes the arm further, making the finish easier — or creating the rolling back take (see below).

Kimura from north-south
North-south is one of the most underused kimura positions. From north-south, you face your opponent’s legs while their head is between your legs. Their arms are in a natural position for kimura attack.
- Identify the near arm. From north-south, your opponent will often post on your legs or hips with one hand to create frames. Trap that arm immediately.
- Lock the figure-four. Scoop under the elbow, grab your wrist, confirm 90 degrees.
- Rotate away. Turn your body away from the trapped arm — walking your legs toward their feet. This creates the rotational force on the shoulder.
- Finish. Drive the hand behind their back with a full body rotation. The north-south kimura finish is very tight because your body weight adds to the lever pressure.
Kimura from half guard — top and bottom
The half guard kimura is one of the most underestimated positions in BJJ. It works from both top and bottom.
From top half guard
When your opponent frames on your face or reaches for an underhook, their arm is exposed. Lock the figure-four on the reaching arm. From here, you can finish the submission by rotating away, or use the grip to pass the guard by walking around their legs. The kimura submission threat and the guard pass threat share the same grip — your opponent cannot effectively defend both at the same time.
From bottom half guard
When your opponent reaches for a crossface or underhook from top half guard, their near arm becomes accessible. Lock the figure-four from your back. From here you cannot typically finish the submission directly — but you can use the grip to sweep, take the back, or come up to single leg. The bottom half guard kimura is primarily a control and transition tool rather than a direct submission.
Watch out: From bottom half guard with the kimura grip, your opponent may attempt to somersault over your body to escape. If this happens, keep your leg entangled and follow their movement. The grip remains — you will arrive in a dominant top position with the kimura still locked.
The kimura trap system
The kimura trap is the evolution of the kimura from a single submission into a complete grappling system. It is the approach used by elite competitors like Gordon Ryan, Craig Jones, and Garry Tonon.
The core idea: once you lock the figure-four grip, you never let it go. You follow your opponent through every transition — sweeps, scrambles, roll-throughs, position changes — and the grip guides you to the next attack.
Instead of forcing one finish, you flow with the opponent’s escape attempts:
- They roll away to escape the submission → follow them and take the back
- They stand up to posture → use the grip to drag them down and sweep
- They straighten the arm to relieve shoulder pressure → switch to the armbar
- They grip their own belt or gi to block → switch to a back take or guard pass
The kimura trap from the turtle position is especially powerful in no-gi. When your opponent turtles, secure the figure-four on the far arm, sit through, and either finish the submission or take the back. The grip controls their entire upper body and limits their ability to recover to guard or stand up.
Key concept: Stop thinking “I need to finish the kimura.” Start thinking “I have the kimura grip — where does their escape take me?” Every defensive movement they make is an opportunity if you keep the grip.
Rolling back take from the kimura
One of the most powerful transitions in the kimura system is the rolling back take from side control. It is one of the highest-percentage back takes in all of BJJ.
- From side control with the kimura locked, begin rotating your body toward their head.
- Your opponent feels the shoulder pressure and rolls away from you to relieve it.
- Follow their roll by diving underneath them. Keep the kimura grip throughout the dive.
- You arrive on their back with the kimura grip already locked — which also eliminates one of their primary back escape options.
- Insert your hooks and attack the rear naked choke. The kimura grip on one arm means they can only defend with one hand.
This back take works whether you finish the kimura or not. The threat of the submission creates the movement that gives you the back. This is the kimura trap system in action.
Gi vs no-gi differences
In the gi: Sleeve and collar grips make locking the figure-four easier — especially in scrambles. You can use the gi fabric to maintain the 90-degree angle when the opponent tries to straighten their arm. The kimura trap is slightly slower in gi because transitions take longer, but the control is tighter.
In no-gi: No fabric assistance. The figure-four must be maintained purely through body mechanics and grip strength. The kimura trap is more dynamic in no-gi — transitions happen faster and the back take opportunities appear more frequently because the opponent’s escapes are quicker and more athletic.
Key no-gi adjustment: In no-gi, establish the figure-four grip faster. The window between when the arm becomes available and when the opponent reacts is shorter without the gi slowing things down. When you see the arm — lock immediately. Hesitation in no-gi costs you the grip.
Combo chains
The kimura connects naturally with every other major submission in BJJ. The figure-four grip creates threats that open multiple follow-up attacks.
Kimura → Armbar
When your opponent straightens their arm to escape the kimura’s shoulder rotation, switch immediately to the armbar. The arm is already isolated and their straightening motion sets the elbow up perfectly. This is the most used kimura combo chain at every belt level.
Kimura → Triangle choke
From the guard kimura, when your opponent postures up to escape, their head comes within range of your legs. Release the kimura grip and catch the triangle choke. The posturing movement that defends the kimura creates the triangle entry.
Kimura → Omoplata
From the guard kimura, if your opponent rolls toward you to escape the grip, use your legs to sweep their rolling arm into the omoplata position. The rolling escape creates the omoplata setup automatically.
Kimura → Guillotine
From the half guard kimura, if your opponent drives their head forward to relieve shoulder pressure, release the kimura grip and attack the guillotine choke. Head-down posture + exposed neck = guillotine. The kimura forces the posture that creates the guillotine entry.
Defense and escapes
Prevention — never let the arm become isolated
The best kimura defense is keeping your elbows close to your body when inside someone’s guard or under side control. Never post a single arm out to the side. If both elbows stay tight, the figure-four grip cannot be established cleanly.
Straighten the arm early
The moment you feel the figure-four being set, straighten your arm before they can establish the 90-degree angle. A straight arm cannot be kimura’d — the shoulder rotation has nowhere to go. This only works before the grip is fully locked.
Grab your own belt or shorts
In gi, grip your own belt with the attacked hand. In no-gi, grip your own shorts or your opposite wrist. This creates a frame that prevents the arm from being rotated behind your back. It is a temporary defense — a strong opponent will eventually break it — but it buys time to escape position.
Roll toward the pressure
Roll your body in the direction the kimura is rotating — toward your own back. This relieves shoulder pressure temporarily and may create an escape to top position. Be careful: rolling toward the pressure in the kimura trap system is exactly what your opponent wants. It leads directly to the back take. Roll and scramble fast.
Stack or drive forward
From the guard kimura, driving your weight forward and stacking your opponent’s hips flattens their ability to rotate. This does not break the grip but gives you time to extract the arm or create an escape position.
Common mistakes
- Elbow separating from the body. This is the most common mistake at every level. The moment the elbow floats away from your chest, the opponent can straighten their arm and the leverage disappears. Squeeze the elbow in constantly.
- Arm not at 90 degrees. If the arm bends too much or straightens too much, the submission loses efficiency. Check and reset the 90-degree angle before rotating.
- Finishing with arms only. Pulling with just your hands tires you out quickly and rarely finishes against a strong opponent. Rotate your entire torso. Use your body weight and hip movement as the primary force.
- Grabbing the hand instead of the wrist. Hand grips slip. Wrist grips lock. Always grip above the wrist bones.
- Forcing the finish instead of following escapes. This is what separates kimura users from kimura trap practitioners. When they escape, follow them. The grip is still on — the next attack is already available.
- Applying too much force too fast. The kimura comes on very quickly. Cranking it hard and fast injures training partners. Apply increasing pressure steadily — give your partner time to tap before the joint is in danger.
Belt-level training guide
The BJJ belt system gives you clear milestones for where your kimura should be at each stage.
White belt — grip and guard finish
Learn the figure-four grip and the closed guard kimura finish only. Focus on the 90-degree rule and keeping the elbow pinned to your chest. Do not try variations yet. Drill the grip establishment 20 times per session before rolling. See the white belt guide for the foundational habits that make every submission — including this one — more effective from day one.
Blue and purple belt — multiple positions and the sweep
Add the side control and half guard kimura. Learn the guard kimura sweep as a separate technique. Start practising the kimura-armbar and kimura-triangle combo chains until the transitions are smooth under pressure. The kimura should be finishing against resisting training partners regularly at this stage.
Brown and black belt — the kimura trap system
Build a complete kimura trap system — rolling back takes, follow-through transitions, turtle attacks, and positional chains. Study how your specific opponents defend and use their escape movements as entries to the next attack. At this level, for advanced study of the full system, Stephan Kesting’s Kimura Roadmap is one of the most comprehensive positional frameworks available.
In competition and MMA
The kimura has 40 documented UFC submission victories — a number that grows every year. Famous finishes include:
- Frank Mir vs. Tim Sylvia (UFC 48, 2004): Mir broke Sylvia’s arm 50 seconds into Round 1, winning the UFC heavyweight title. Sylvia held on past the tap point — the kimura is unforgiving when held.
- Fabricio Werdum vs. Fedor Emelianenko (Strikeforce, 2010): Werdum submitted one of MMA’s greatest heavyweights with a kimura in one of the sport’s biggest upsets.
- Anderson Silva vs. Chael Sonnen (UFC 117, 2010): Silva was losing badly in Round 5 when he caught Sonnen in a kimura — one of MMA’s most dramatic comebacks and one of the most famous kimura finishes ever recorded.
Before competing, always check the IBJJF complete guide for your division. The kimura is legal at all adult belt levels in both gi and no-gi IBJJF competition. It is restricted in youth divisions. Apply it slowly in competition — the technique comes on fast and referees cannot always intervene before injury occurs.
Frequently asked questions
What is the kimura in BJJ?
The kimura is a shoulder lock submission that uses a figure-four grip to rotate the opponent’s arm behind their back, placing stress on the shoulder capsule and rotator cuff. Named after Japanese judoka Masahiko Kimura, who used it to defeat Helio Gracie in 1951.
What is the difference between the kimura and the americana?
Both use the same figure-four grip but rotate the shoulder in opposite directions. The kimura rotates the arm upward and behind the back. The americana pushes the hand down toward the mat. The kimura works from guard, side control, and north-south. The americana works best from mount and side control with the arm flat on the mat.
What is the kimura trap system?
The kimura trap is a modern BJJ system where you establish the figure-four grip and follow it through every positional transition instead of forcing one finish. When the opponent moves to escape, you use that movement to sweep, take the back, or switch submissions. The grip becomes a control position rather than just an attack.
What is the correct arm angle for the kimura?
The opponent’s arm must be bent at approximately 90 degrees throughout. This prevents them from straightening the arm to escape, gives maximum leverage over the shoulder joint, and creates the strongest structural control.
Is the kimura legal in all BJJ divisions?
The kimura is legal for adult competitors at all IBJJF belt levels in both gi and no-gi competition. It is restricted or prohibited in youth divisions. Always check current IBJJF rules for your specific age, belt, and division before competing.
How do I stop my opponent from straightening their arm to escape?
Keep the elbow pinned tightly against your body at all times. The moment the elbow separates from your chest, the opponent can straighten the arm and relieve pressure. Use your chest and ribs — not just your hands — to clamp the elbow in place throughout every transition.
Can the kimura be used for sweeps and back takes — not just submissions?
Yes — and this is what makes the kimura unique. Once the figure-four grip is locked, you control your opponent’s entire upper body. From guard you can sweep them directly. From half guard you can pass to side control. From any position you can follow their escape to take the back. Viewing the kimura only as a submission misses the majority of its value.
Quick reference
| Element | What to do |
|---|---|
| Grip | Wrist (not hand) + arm under elbow + grab own wrist |
| Arm angle | 90 degrees — maintained throughout every transition |
| Elbow position | Pinned to your chest — no daylight, ever |
| Finish mechanics | Rotate entire torso — not arms alone |
| Kimura vs americana | Kimura: arm up and behind. Americana: hand down to mat. |
| Guard kimura sweep | Opponent straightens arm → sit up → drive over |
| Rolling back take | Opponent rolls to escape → dive under → arrive on back |
| Kimura trap rule | Never release the grip — follow their escape to the next attack |
| Primary combos | → Armbar → Triangle → Omoplata → Guillotine → Back take |
The kimura is the submission that keeps giving. Every other technique gets you a tap or it fails. The kimura gets you a tap, a sweep, a back take, a guard pass, or a transition — all from one grip.
Start with the figure-four grip from closed guard. Get the 90-degree rule and the elbow pinch automatic. Add the guard sweep. Add side control. Then start following escapes instead of forcing finishes. That is when the kimura trap begins — and when the submission becomes a system.
Mohsin has trained Brazilian jiu-jitsu for 6 years at Gracie Bara.
He has competed at IBJJF-affiliated tournaments and writes about BJJ
competition, gear, and athlete careers. He founded BJJ Sportswear
to help grapplers find quality equipment and information.