Rear Naked Choke BJJ: Setup, Grip & Back Control Guide

The rear naked choke is the most effective submission in BJJ.

Not one of the most effective. The most effective. The data backs it up — it accounts for 22% of all submission finishes across major BJJ and MMA competitions. In the UFC alone, it makes up 49.1% of all choke finishes. No other single technique comes close.

Why? Because it is applied from back control — the strongest position in grappling. Your opponent cannot see you. They cannot strike you effectively. And once the figure-four grip is locked with both carotid arteries compressed, there is no muscling out of it. The tap comes in seconds.

Gracie University has called it the technique responsible for more fight victories than all other submissions combined. John Danaher made it one of only six submissions he teaches in his core system. Royce Gracie used it to defeat larger opponents at the first UFC events. Nicky Rod won 100% of his matches at the Craig Jones Invitational using it.

This guide covers everything — the mechanics, the finish, every grip variation, how to take the back, how to beat chin tuck defenses, and how to chain it with other submissions at every belt level.

rear naked choke

What Is the Rear Naked Choke?

What Is the Rear Naked Choke?

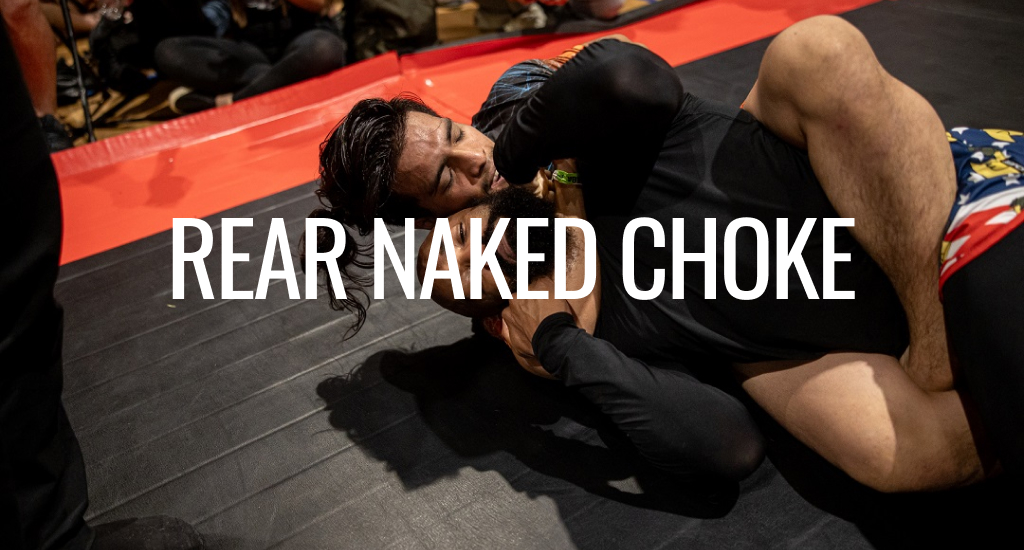
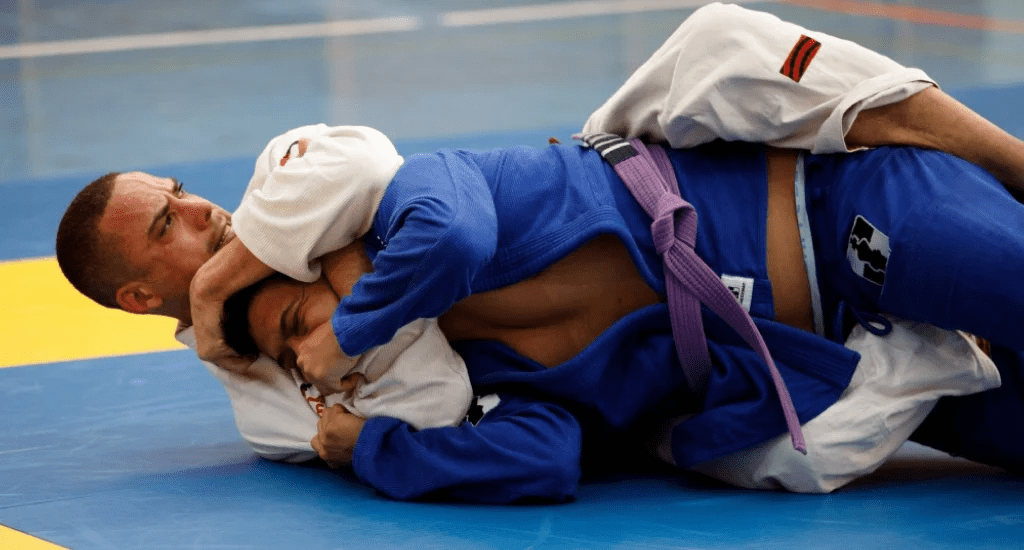
The rear naked choke is a blood choke applied from back control. You slide your choking arm under the opponent’s chin and across the front of their neck. Your other arm locks behind their head in a figure-four position. Squeezing compresses both carotid arteries simultaneously.

It is called “naked” because it uses no clothing. No gi lapel, no collar grip, no fabric of any kind. Just your arms against their neck. This makes it equally effective in gi, no-gi, and MMA.

It is known by three names:

  • Rear naked choke (RNC) — the English name used in BJJ and MMA
  • Mata leão — Portuguese for “lion killer,” the name used in Brazilian Jiu-Jitsu
  • Hadaka jime — Japanese for “naked choke,” the name from judo

All three names refer to the same technique. One position. One mechanism. The highest submission finish rate in all of combat sports.

History and names

According to the rear naked choke on Wikipedia, the technique has roots stretching back to Japanese judo, where it appears in the Kodokan’s Shime-waza (constriction techniques) list as hadaka jime. The key distinction in judo was that it required no clothing to apply — unlike collar chokes — making it one of the rare submissions that works in any context.

The historical reach goes further. Some researchers trace a version of the hold to Sebald Beham’s 1548 illustration depicting Hercules defeating the Nemean Lion with a neck strangle — which is the origin of the name mata leão, meaning lion killer.

The Gracie family brought the technique to Brazil through their judo lineage. According to BJJ Heroes, the rear naked choke became central to the early Gracie challenge match system because it worked against any opponent, regardless of size, and could be applied quickly once back control was achieved.

Royce Gracie then introduced the technique to a global MMA audience at UFC 1 in 1993. During the first 168 UFC events, the RNC accounted for 32% of all submission victories — the highest percentage of any single technique. That number has only grown since.

Competition fact: The rear naked choke accounts for 22% of all submission finishes in major BJJ and MMA competitions. In the UFC, it makes up 49.1% of all choke finishes — more than any other single technique in combat sports history.

How the rear naked choke actually works

The rear naked choke is a blood choke. It does not compress the windpipe or restrict breathing. It compresses the carotid arteries — the blood vessels on either side of the neck that carry oxygenated blood from the heart to the brain.

When both carotid arteries are compressed simultaneously, blood flow to the brain stops. The brain begins to lose function within seconds. Unconsciousness follows in an average of 8.9 seconds once the choke is fully locked, according to published research cited on Wikipedia.

The anatomy makes this submission uniquely reliable. Your opponent cannot muscle out of it. They cannot hold their breath. They cannot flex their neck enough to stop the carotid compression. Once the figure-four is set and both arteries are compressed, the only options are to tap or go unconscious.

Key principle: This is a blood choke — not an air choke. Do not squeeze the windpipe. Squeeze the sides of the neck. The pressure should feel like a steady, increasing compression — not a crush. Done correctly, the opponent feels pressure but no pain in the throat.


Back control comes first

The most important rule in BJJ is position before submission. For the rear naked choke, that position is back control.

Back control is widely considered the strongest position in all of grappling. The person on the bottom cannot see their attacker. They cannot strike effectively. They cannot escape without giving up their back or creating an opening. You can attack freely with little risk of counterattack.

To hold back control correctly before attempting the choke:

  • Chest to back. Stay glued to your opponent’s back. Any space between your chest and their back lets them turn into you and escape.
  • Seatbelt grip. One arm goes over their shoulder. The other arm goes under the opposite armpit. Clasp your hands together in the center of their chest. This is your seat belt.
  • Hooks in. Your feet go inside their thighs — not hooked around the outside. Hooks inside the thighs control the hips and prevent them from standing or turning out.
  • Head position. Keep your head on the same side as your under-arm (the bottom arm of the seatbelt). This protects you from headbutts and gives you better control when threading the choke.

Do not rush to the choke. If your back control is loose, they will escape before the choke is set. Establish the seatbelt and hooks first. Control before submission — every time.


Step-by-step: how to finish the rear naked choke

Once back control is solid, follow these steps in order.

  1. Use your top arm. From the seatbelt grip, slide your over-shoulder arm (the top arm) across your opponent’s neck. Your forearm goes under their chin — not on the throat. Your elbow should align roughly with the centre of their chin.
  2. Thread under the chin. Your choking arm slides across and under the chin as deeply as possible. The deeper the arm, the less work the finish takes. If they are tucking their chin, deal with this first (see the chin tuck section below).
  3. Lock the figure-four. With your choking arm in place, grip the bicep of your other arm with the hand of your choking arm. Then bring that second arm up and behind the opponent’s head. Your hands are now locked in a figure-four — your choking arm across their neck, your second arm behind their head.
  4. Expand your chest. This is the finish most beginners miss. Do not squeeze inward with your arms alone. Expand your chest outward, away from their back, while squeezing your elbows together. This creates the carotid pressure.
  5. Pull the head forward. Your second arm behind the head pushes their chin toward their chest. This closes the gap and removes any remaining space. The choke tightens instantly.
  6. Stay tight and wait. Do not jerk or crank. Apply steady, increasing pressure. The tap comes in seconds. If they do not tap, they will go to sleep — release immediately the moment you feel their body go limp.

Grip variations

Your choking hand grabs the bicep of your other arm. Your other arm wraps behind the head. This is the standard and most reliable grip. It creates maximum leverage without requiring strong hand grip. The figure-four itself acts as a mechanical lock — you are squeezing with your entire upper body structure, not just your hands.

Palm-to-palm grip

Instead of grabbing the bicep, you clasp both hands together in front of the opponent’s neck. This is faster to apply and works when you do not have time to thread the full figure-four. It is slightly less powerful but still highly effective. Anderson Silva used this variation when he defeated Dan Henderson in the UFC.

Blade of the wrist (hadaka jime style)

Used in judo and some no-gi situations. The blade of the wrist digs into the carotid sinus on one side while the other arm supports behind the head. Faster to apply than the figure-four but requires more precise placement. Less common in modern BJJ competition but still effective in scrambles.

Which grip to use: Learn the figure-four first. It is the most reliable under pressure. Add the palm-to-palm as a secondary option for fast-moving scrambles once you are comfortable with the primary version.


Hooks vs body triangle: which is better?

Once you have back control, you have two options for controlling your opponent’s lower body. Each has specific advantages.

Hooks (default)

Your feet go inside the opponent’s thighs. This is the standard back control position. Hooks allow you to follow your opponent’s movement easily — when they try to roll, your body follows. You can adjust your angle for the choke quickly. Hooks are harder to keep against a very flexible or tall opponent who can strip them.

Body triangle

Instead of hooks, you wrap both legs around the opponent’s midsection and lock one leg behind the knee of the other in a triangle shape. This is a tighter, more controlling position. It is harder for the opponent to turn into you or strip your legs. The downside is that you cannot rotate as freely to follow their movement. Switch to the body triangle when your opponent is defending with strong hip movement or stripping your hooks repeatedly.

Key decision: Start with hooks. If your opponent strips one hook repeatedly or is escaping by turning into you, switch to the body triangle. Both positions set up the rear naked choke equally well — the body control method is a matter of preference and the opponent’s defense.


How to take the back: high-percentage entries

Arm drag from guard

From closed guard, grip their wrist with one hand and push it across their body. With your other hand, pull their tricep. This creates an off-balance that exposes their back. As they tip forward, sit up and rotate to take the back. Establish your seatbelt grip before they can turn into you.

From the turtle position

When your opponent turtles — on all fours with their head down — approach from the side. Get a seatbelt grip over their body. Insert your bottom hook first, then roll them onto their side. Get the second hook in and establish full back control. The turtle is one of the most common back-take opportunities at every level of BJJ.

Back take from half guard

When you have top half guard and your opponent is turning away to create frames, go with their movement. Take the seatbelt grip as they turn and follow them onto their side. Insert your hooks as you roll. This is one of the fastest back takes in gi BJJ and works consistently across all belt levels.

After a triangle choke defense

When your opponent postures up hard to escape your triangle, they often expose their back in the process. As they rise and turn, release the triangle and use the momentum to follow them onto their back. Establish the seatbelt and insert your hooks before they can turn to face you.

Seatbelt roll from single leg X-guard

From single leg X-guard, when your opponent stands to escape the leg entanglement, use that standing momentum to come up behind them. Grab the seatbelt, drag them down, and insert your hooks. This is a common high-level no-gi back take entry.


Beating the chin tuck defense

The most common defense against the rear naked choke is the chin tuck — the opponent drops their chin to their chest to block your forearm from threading under their neck. If you cannot get your arm under the chin, you cannot finish the choke. Here is how to beat it.

The two-on-one peel

While your choking arm is blocked by their chin, use both hands to grip the back of their head and pull it toward their chest. Then quickly free one hand, post on their forehead, and push their head back. This sudden direction change often opens the chin just long enough to thread your arm under.

Nose or forehead peel

Use your free hand — your non-choking hand — to push up on their nose or forehead, tilting their head back. As the chin lifts, thread your choking arm immediately. Do not push on the chin itself. Use the nose or forehead for the tilt. This is the most common chin tuck counter used at high-level competition.

Neck crank to choke

Place your forearm directly on the chin and apply downward pressure as a crank. This is uncomfortable — they will either tap to the crank or lift their chin to relieve pressure. Either way, you win. If they lift the chin, thread immediately. If they tap to the crank, the match is over. Note: in some competition rulesets, cranks are restricted at lower belt levels — check the rules for your event.

Arm-in choke as alternative

When the chin tuck is very tight and none of the above work, consider the arm-in variation — include their arm inside your choking arm. This changes the choke’s mechanics slightly but still compresses the carotid and finishes the submission. The arm-in version is harder to defend and often surprises opponents who are focused on tucking the chin.


Gi vs no-gi differences

In the gi: The gi slows transitions and gives you more friction to maintain back control. However, your opponent also has more friction to escape. You can use collar grips to assist in controlling their head and tilting the chin for the choke entry. Bow and arrow choke from back control is also available as a combination option.

In no-gi: No collar grips. Everything is faster and more slippery. The seatbelt grip must be tighter because there is no fabric to grip. The chin tuck is often more effective in no-gi because your opponent can slide out faster. Prioritise getting your head to the mat on the non-choking side — this stops them from rolling you and gives you a stable base to finish from.

Key no-gi adjustment: In no-gi, attack the choke the moment you take the back — before your opponent has time to establish a defensive posture. In the gi you have more time to settle. In no-gi, early pressure is essential.

In MMA: The rear naked choke is even more effective in MMA. Gloves make it harder for your opponent to peel your arm or grip-fight. They are also focused on defending strikes, which creates openings for the choke. The RNC accounts for 49.1% of all UFC choke finishes for this reason.


Combo chains

The rear naked choke becomes even more dangerous when combined with other attacks. When your opponent defends the choke, they create openings for these follow-up submissions.

RNC → Bow and arrow choke (gi)

When the opponent defends the rear naked choke by gripping your choking arm and pulling it down, grab their collar with your choking hand and extend the bow and arrow. This is the natural combo chain in gi back attacks. See our guide on the bow and arrow choke for the full breakdown.

RNC → Armbar

When the opponent grips your choking arm with both hands and is pulling hard to defend, your arm is already across their body in the right position. Drop the choke grip, pivot to the side, and extend that arm into an armbar from back control. The two-handed grip they used to defend the choke is now trapping their own arm for the armbar.

RNC → Triangle choke

When the opponent slides down and turns into you to escape back control, they often end up in your guard with one arm inside. Catch the triangle choke as they turn. This is a natural transition when the back escape becomes a guard recovery on the bottom.

Back control → Omoplata

When the opponent is on their side and defending with a far arm, the omoplata becomes available from top back control. This is less common but works well against opponents who have strong chin tuck defenses and are turning to face you.


Defense and escapes

Prevention — do not give up the back

The most effective defense against the rear naked choke is never allowing back control. Keep your elbows in, do not roll onto your stomach, and never turn away from your opponent when they are passing your guard. Once the back is taken, your options narrow significantly.

Back survival posture

If back control is taken, immediately get into a strong defensive posture: chin tucked, elbows down, both hands active to grip-fight. Do not reach out with your arms — keep them tight to your body to prevent the seatbelt and choke from being set.

Hand fighting

As your opponent’s choking arm comes across, grip their wrist with both hands and pull it down before they can thread under the chin. This is a race — the earlier you intercept the arm, the easier it is to peel. Once the figure-four is locked, peeling is almost impossible.

Drive to the underhook side

Turn your body toward the arm that is under your armpit (the bottom arm of the seatbelt). This is the safer direction. Drive your hips to the mat on that side and work to get your back to the floor. From there, you can begin turning into your opponent and recovering guard.

Chin tuck and wait

If you cannot peel the arm, tuck your chin hard and keep your shoulders up. This buys time. Your opponent will eventually need to beat the chin tuck — and as they try, you may find an opening to turn or stand.


Common mistakes

  • Rushing before back control is secure. The most common mistake at every level. If the seatbelt and hooks are not stable, the choke attempt creates an escape opportunity. Establish control first, then attack.
  • Squeezing only with the hands. The finish requires chest expansion combined with elbow squeeze. Squeezing only with hand grip tires your arms and often does not generate enough pressure on the carotids.
  • Choking arm too high or too low. Too high and you are on the jaw — painful but not a blood choke. Too low and you are on the throat — an air choke that takes too long. The forearm sits across the neck, with the crook of the elbow aligned with the centre of the chin.
  • Letting go of the seatbelt too early. Many beginners release the seatbelt as soon as they start threading the choke. Keep the seatbelt grip until the figure-four is fully locked — otherwise your opponent turns into you and escapes.
  • Not putting your head down. Your head should go to the mat on your non-choking side when finishing. This stops your opponent from rolling you and gives you additional leverage for the squeeze.
  • Ignoring the chin tuck. Trying to muscle through a chin tuck with raw squeezing almost never works. Address the chin tuck with technique first — nose peel, forehead push, or arm-in variation — then apply the choke.

Belt-level training guide

The BJJ belt system gives you a clear framework for where this technique should be in your game at each stage.

White belt — one back take, one finish

Learn back control from the turtle position only. Do not try multiple back take entries yet. Focus on establishing the seatbelt grip, getting both hooks in, and finishing the figure-four choke. Drill the sequence 15 to 20 times per session — back take, seatbelt, hooks, figure-four, finish. See the white belt guide for the fundamental positions every beginner should build around this submission.

Blue and purple belt — multiple entries and chin tuck beats

Add back take entries from guard arm drags and half guard. Learn to beat the chin tuck with the nose peel and forehead push. Practice the RNC to armbar combo until the switch is automatic. At this stage the rear naked choke should be finishing regularly in live rolling against resisting training partners.

Brown and black belt — complete back attack system

Develop a full back attack system — body triangle versus hooks decisions, multiple chin tuck solutions, combo chains between RNC, bow and arrow, and armbar. Study how your specific opponents defend and adjust. At this level, for advanced study on building a complete system, John Danaher’s Back Attacks: Enter the System is one of the most detailed resources available.


Rear naked choke in competition

The rear naked choke is the dominant submission in BJJ and MMA competition at every level. The numbers are consistent across formats and rulesets.

In the UFC, the RNC accounts for 49.1% of all choke finishes and 22% of all submission victories. During the first 168 UFC events specifically, it made up 32% of all submission wins — the highest of any technique. No other submission is close in consistency across weight classes, genders, and experience levels.

In gi BJJ competition, check the IBJJF complete guide for your division’s rules. The rear naked choke is legal at all belt levels in all IBJJF competition formats — gi and no-gi. There are no restrictions based on age division or weight class.

Famous competition finishes include Miesha Tate submitting Holly Holm in Round 5 of UFC 196 to win the bantamweight title — one of the most dramatic rear naked choke finishes in MMA history. Royce Gracie’s submission victories in the early UFC events. And Nicky Rod winning every single match at the first Craig Jones Invitational with the RNC, demonstrating the technique’s dominance at the highest levels of modern no-gi competition.


Rear naked choke for self-defense

The rear naked choke is one of the most practical self-defense submissions that exists. It requires no gi, no special clothing, and works on any body type. Once applied correctly from back control, size and strength differences become almost irrelevant.

In a self-defense context, the back position is often achieved naturally when a confrontation goes to the ground and you end up behind your attacker. From there, the same mechanics apply — seatbelt grip, hooks or body control, figure-four, chest expansion and squeeze.

The blood choke mechanism means the submission works quickly — within seconds — and causes no permanent injury when released immediately after the tap or unconsciousness. This is important in a self-defense context where causing unnecessary injury could have legal consequences.

Practice the back take and rear naked choke from realistic positions in every class. The ability to take the back and apply this choke is one of the most valuable self-defense skills BJJ can give you.


Frequently asked questions

Is the rear naked choke a blood choke or an air choke?

It is a blood choke. It compresses the carotid arteries on both sides of the neck, cutting blood flow to the brain. It does not target the trachea or windpipe. Blood chokes are faster, safer, and more reliable than air chokes.

How long does the rear naked choke take to cause unconsciousness?

Research shows a properly applied rear naked choke causes unconsciousness in an average of 8.9 seconds once fully locked in. Most opponents tap before that point because the pressure builds fast and there is no stopping it once the figure-four is set.

What is the best grip for the rear naked choke?

The figure-four grip is the most reliable. Your choking arm slides under the chin and locks on your other bicep. Your second arm wraps behind the opponent’s head. Squeeze your elbows together and expand your chest to finish. The palm-to-palm grip is an alternative for faster scramble situations but provides slightly less leverage.

What is the difference between the rear naked choke and the mata leão?

They are the same technique. Mata leão is the Portuguese name used in BJJ and translates to “lion killer.” The rear naked choke is the English name. The Japanese name from judo is hadaka jime, meaning “naked choke.” All three refer to the same submission applied from back control.

What is the best defense against the rear naked choke?

The best defense is prevention — never allow back control. If back control is taken, immediately tuck your chin, shoot your shoulders up, and grip-fight with both hands to stop the choking arm from threading under your neck. Drive to the underhook side and work to get your hips to the floor.

Does the rear naked choke work in MMA with gloves?

Yes — and it works even better than in no-gi grappling. MMA gloves make it harder for the opponent to peel your forearm or grip-fight effectively. The rear naked choke accounts for 49.1% of all UFC choke finishes, which proves how effective it is with gloves on.

Should I use the body triangle or hooks when applying the rear naked choke?

Both work, but they serve different situations. Hooks are the default — they allow you to follow your opponent’s movement and adjust for the choke quickly. Switch to the body triangle when your opponent strips your hooks repeatedly or uses strong hip movement to try to escape. Most practitioners use hooks as the primary control and the body triangle as a secondary option.


Quick reference

ElementWhat to do
Position firstBack control — seatbelt + hooks — before anything else
Choking armUnder the chin, forearm across the neck, elbow at centre of chin
GripFigure-four — choking hand grabs other bicep, second arm behind head
FinishExpand chest outward + squeeze elbows + pull head forward
Chin tuck counterNose peel / forehead push / arm-in variation
Lower bodyHooks (default) or body triangle (against strong hip defense)
Head positionDown on the mat — non-choking side
Primary combos→ Bow and arrow (gi) → Armbar → Triangle (when they escape)

The rear naked choke is the most reliable submission in BJJ for a reason. It comes from the strongest position in grappling. It uses a blood choke mechanism that cannot be muscled out of. And once the figure-four is locked, there is nowhere for your opponent to go.

Learn back control first. Make the seatbelt and hooks automatic. Then add the figure-four finish. Then add entries, chin tuck counters, and combo chains. Build it layer by layer. In six months of consistent drilling, this will be the submission you finish most in competition and sparring — because the data already tells you it should be.

Scroll to Top